

How to Clean Slow Feeder Dog Bowls: Step-by-Step
Table of Contents
- Why Cleaning Slow Feeder Dog Bowls Matters
- What You'll Need Before You Start
-
Step-by-Step Cleaning Method for Slow Feeder Bowls
- Step 1: Scrape and Tap Out Loose Food (Dry, Before Water)
- Step 2: Soak in Warm Soapy Water (5-15 Minutes)
- Step 3: Scrub Channels, Corners, and Transitions
- Step 4: Spot-Treat Stubborn Residue with Diluted White Vinegar
- Step 5: Rinse Until Water Runs Clear
- Step 6: Dry Fully and Inspect Under Good Light
- How to Remove Food from Slow Feeder Bowl Grooves
- How Often to Wash Dog Bowls
- How to Clean Silicone Dog Bowls
- Are Slow Feeder Bowls Dishwasher Safe
- Common Mistakes to Avoid When Cleaning
- Frequently Asked Questions
Last Updated: October 16, 2026
Why Cleaning Slow Feeder Dog Bowls Matters
Clean slow feeder dog bowls prevent bloating, reduce gulping, and make mealtime more engaging.
Without proper cleaning, bacteria and biofilm accumulate in hard-to-reach areas, creating a breeding ground for microorganisms that can upset your dog's stomach or cause infections. Residue also hardens over time and becomes nearly impossible to remove without the right technique.
We recommend cleaning slow feeder dog bowls daily, especially for wet food or treats. A quick rinse isn't enough; you need a systematic approach that targets every groove and corner.
What You'll Need Before You Start
Gathering the right supplies makes cleaning faster and more effective, and you don't need expensive specialty products.
Essential supplies:
- Warm water
- Dish soap (or a gentle, non-toxic cleaner)
- A dedicated bowl brush or bottle brush
- A sponge with a scrubbing side
- Clean towel or drying rack
- Optional: white vinegar and hydrogen peroxide for stubborn residue
The key is a brush with bristles thin enough to reach narrow grooves. A standard sponge works for flat surfaces, but you'll need a bottle brush or dedicated pet bowl brush for the ridges; a soft toothbrush helps with extremely tight grooves.
Warm water is essential: it softens dried food and dissolves oils better than cold water. Avoid boiling water, which can damage some bowl materials over time.
Step-by-Step Cleaning Method for Slow Feeder Bowls
This sequence is built for maze-style slow feeders, where ridges, dead ends, and narrow channels change how you remove residue. The order matters: dry removal, soaking, targeted scrubbing, a residue check, then drying. Skipping or reordering steps is the most common reason grooves stay slimy.
Step 1: Scrape and Tap Out Loose Food (Dry, Before Water)
Hold the bowl over the trash and tap the base and sides firmly.
Why dry first: water turns starches and fats into a paste that spreads into unreached channels. Removing loose material dry keeps wash water cleaner and shortens the soak.
Inspect the dead ends now; loosen packed food in a closed channel with a chopstick or small spoon before soaking, without gouging the surface.
Step 2: Soak in Warm Soapy Water (5-15 Minutes)
Fill a sink or basin with warm water and a squirt of dish soap, submerging the bowl fully so water reaches every channel. Soak 5-10 minutes routinely, up to 15 for dried or sticky residue.
Warm water softens fats and dried starches; cold water does not. Avoid boiling water, which can warp some plastics and degrade silicone over repeated exposure.
If the bowl floats or traps air, weigh it down with a plate or flip it periodically so both sides contact the soapy water.
Step 3: Scrub Channels, Corners, and Transitions
Take the bowl out of the soak and scrub every surface with a dedicated bowl brush or bottle brush. Critical zones:
- The inside corners where a ridge meets the bowl wall
- The closed ends of maze channels
- The transition where a shallow channel drops into a deeper pocket
- The outer rim and the underside lip
Use short back-and-forth strokes along each channel, then circular motions at corners. Thin bristles reach where a sponge cannot; for very tight grooves, a soft toothbrush gives more control.
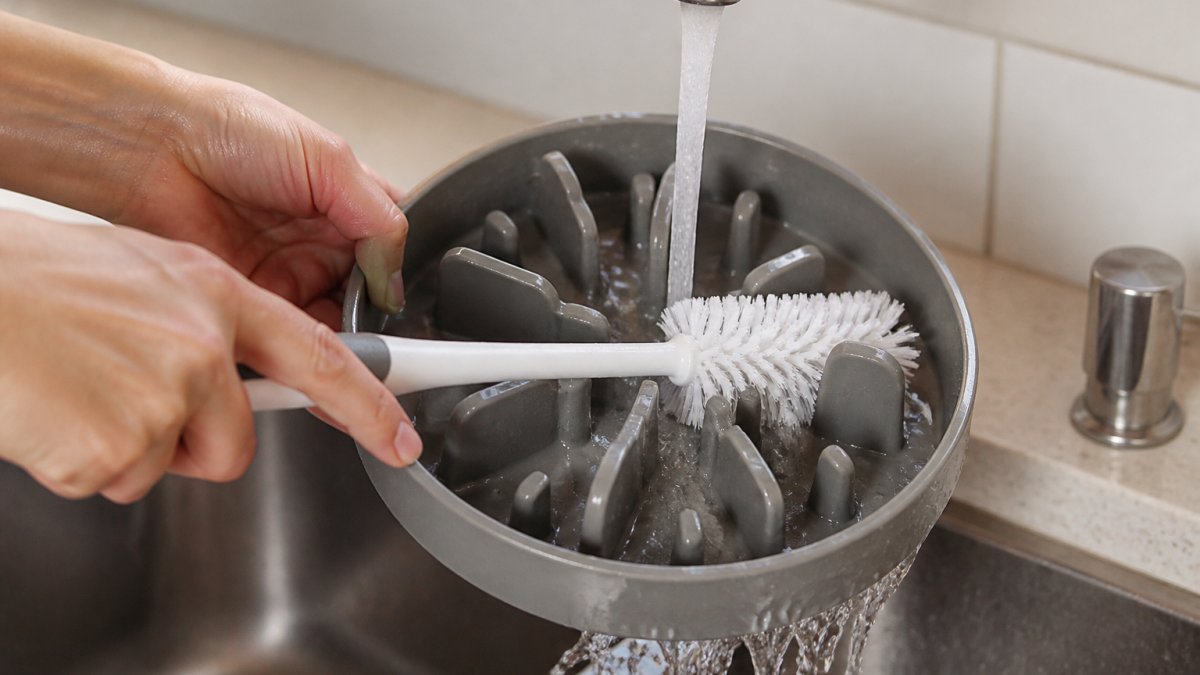
Don't assume a pass over the top surface is enough. Run a finger along each channel; if you feel slickness or grit, scrub again.
Step 4: Spot-Treat Stubborn Residue with Diluted White Vinegar
If residue remains, mix equal parts white vinegar and warm water. Dip the brush, scrub the stubborn spots, and let it sit 2-3 minutes before scrubbing again. Vinegar breaks down mineral film and dried-on residue that soap alone misses.
For silicone bowls that hold odors, apply a baking soda paste for about 5 minutes, scrub gently, and rinse well.
Step 5: Rinse Until Water Runs Clear
Rinse under running warm water, working the stream into each channel and rinsing the underside and rim until the water runs clear and no soap slick remains.
Run a finger along every groove; the surface should feel smooth, not slippery. Soap residue can upset a dog's stomach, so rinse more than you think you need to.
Step 6: Dry Fully and Inspect Under Good Light
Dry with a clean towel or on a drying rack with channels facing down so water drains out; moisture trapped in a closed channel is where biofilm restarts.
Inspect under bright light for dull film, discoloration, or grit in the dead ends; if found, repeat the scrub and rinse. Check for cracks, chips, or worn spots that could harbor residue, and replace the bowl if damage is significant.
How to Remove Food from Slow Feeder Bowl Grooves
The grooves that make slow feeder bowls effective are also where food gets trapped most easily, so removing it requires patience and the right technique.
Apply gentle pressure with short scrubbing motions, pushing the bristles deep into the grooves and pulling them out along the entire length of each ridge.
For extremely stubborn food, try using a soft toothbrush. The thin bristles can reach into even the tightest grooves.
If food remains, make a warm-water solution with white vinegar (equal parts). Soak the bowl for 5 minutes, then scrub again with your brush.
Always rinse thoroughly after using vinegar.
How Often to Wash Dog Bowls
How often you wash a slow feeder bowl depends on what your dog eats and how much residue builds up.
If your dog eats wet food or treats in the slow feeder bowl, wash it daily.
Give the bowl a thorough deep clean (following the full step-by-step method) at least twice a week.
If you notice slime, discoloration, or an odor in the grooves, wash the bowl immediately.
Washing frequency guide:
- Wet food or treats: daily full wash
- Dry kibble: daily rinse, full wash every other day
- Deep clean with vinegar: twice weekly
- Inspect for buildup: daily
How to Clean Silicone Dog Bowls
Silicone slow feeder bowls are popular because they're durable and flexible, but they require slightly different cleaning than plastic or ceramic bowls.
Soak silicone bowls in warm soapy water for 10-15 minutes.
After soaking, scrub with a dedicated brush or sponge.
For stubborn stains or odors on silicone, make a paste with baking soda and water.
White vinegar also works well on silicone bowls.
Always rinse silicone bowls thoroughly after washing.
Are Slow Feeder Bowls Dishwasher Safe
Some slow feeder bowls are dishwasher safe and some are not, and the difference is not always obvious from the material alone. The safe approach is to verify before you load, then place and run the dishwasher in a way that protects both the bowl and the cleaning result.
How to Verify Compatibility
Check the manufacturer's instructions or the packaging first. Look for an explicit "dishwasher safe" statement, not just a recycling symbol. If the bowl came with a care card, keep it.
A common pattern is that rigid plastic and stainless steel slow feeders are more often rated for the dishwasher, while some silicone and ceramic designs are hand-wash only or top-rack only.
If you cannot confirm compatibility, hand wash. Hand washing also lets you inspect each channel, which a dishwasher cycle does not.
Placement and Cycle Guidance
If the bowl is rated dishwasher safe:
- Place it on the top rack. The top rack runs cooler and is gentler on plastics and silicone.
- Load it so it does not nest tightly against other items. Water needs to reach the channels.
- Face the open side down or angled so water can drain and spray can enter the maze.
- Use a normal or gentle cycle with a standard dishwasher detergent.
- Skip high-heat drying or heated dry if the bowl is plastic or silicone; air-dry instead.
Avoid overcrowding. A slow feeder placed against a wall of plates may come out with residue still packed in the dead ends.
Material and Design Trade-Offs
- Plastic: More likely to be dishwasher safe, but repeated high heat can warp thin sections and dull the surface over time. Warping can create new crevices that trap food.
- Stainless steel: Generally tolerant of dishwasher heat, but check for a coated or painted finish, which may not be rated for dishwasher detergent.
- Ceramic: Check for a dishwasher-safe glaze. Some ceramic bowls are hand-wash only, and chips or cracks make any bowl unsafe to keep using.
- Silicone: Often top-rack only or hand-wash recommended. High heat can degrade silicone and cause it to hold odors.
When to Hand Wash Instead
Hand wash when the bowl has very tight channels, when the material is unconfirmed, when the bowl shows cracks or wear, or when you want to inspect each groove. A dishwasher is a convenience, not a guarantee that every dead end is clean.
Common Mistakes to Avoid When Cleaning
Skipping the soak step is the biggest mistake most people make.
Using cold water instead of warm water is another common error.
Not rinsing thoroughly enough leaves soap residue in the grooves.
Forgetting to dry the bowl completely before the next use can allow bacteria to grow.
Using harsh chemicals or bleach is unnecessary and potentially harmful. Dish soap, warm water, and white vinegar are all you need.
Not inspecting the bowl for damage during cleaning is a missed opportunity.
Frequently Asked Questions
How do you clean food out of the grooves in a slow feeder bowl?
Use a dedicated bottle brush or soft-bristled brush to target the grooves directly. Soak the bowl in warm water with a few drops of dish soap for 10-15 minutes first to soften stuck-on food. For stubborn residue, make a water and white vinegar solution (equal parts), soak for another 15 minutes, then scrub again. A toothbrush can reach tight corners. Rinse thoroughly under hot water until no soap or vinegar remains.
How often should you wash a slow feeder bowl?
Wash your dog's slow feeder bowl after every meal. Daily rinsing removes food bits and prevents slime and biofilm buildup, which can harbor bacteria. Even if your dog doesn't finish all the food, rinse the bowl thoroughly with warm water and wash it with dish soap at least once daily. Between meals, a quick rinse keeps the bowl fresh and ready for the next feeding.
Can slow feeder dog bowls go in the dishwasher?
Most slow feeder bowls are dishwasher safe, but check the manufacturer's instructions first. If dishwasher-compatible, place the bowl on the hot cycle for thorough sanitizing. Hand washing with hot water and gentle cleaner works equally well and gives you more control over scrubbing hard-to-reach areas. Avoid high-heat settings if the bowl is plastic, as extreme temperatures can warp the material over time.
Is it safe to use vinegar and hydrogen peroxide to clean dog bowls?
Yes, both are safe for cleaning dog bowls when used correctly. A water and white vinegar solution (equal parts) removes food residue and disinfects naturally. Hydrogen peroxide also sanitizes without toxic residue. Always rinse the bowl thoroughly with clean water after using either solution to remove all traces before your dog eats from it. These eco-friendly cleaners are non-toxic and safe for pets.
Keeping your dog's slow feeder bowl clean is one of the simplest ways to support their health and safety. A few minutes of daily care prevents bacterial buildup and ensures every meal is served in a hygienic bowl. Chewzzle slow feeder bowls are designed with easy-to-clean materials, but every bowl benefits from the proper cleaning technique. Get started with Chewzzle and give your dog the mental stimulation and healthy eating habits they deserve.